Snowshoes, skis, boots, poles, inflatable kayaks, paddling gear, tents, sleeping bags, sleeping pads, stoves – and don’t even get me started on over a dozen different backpacks for overnight trips, skiing, day hiking, biking… We’ve got a lot of stuff to store! So, how do you create the perfect space for storing outdoor gear? Read on for a few of our tried-and-true tips.
Disclosure: This post contains affiliate links. If you buy something from one of our affiliates, we receive a small commission at no extra charge to you. Thanks for helping to keep our blog up and running!

Table of Contents
Move, Sort and Sell
We’ve bought a new adventure base – moving not long after this post comes out. So, what does our moving have to do with storing outdoor gear? Well, it’s got me thinking about a lot about what we can set up in the new place. We’ve got everything perfectly organized at the moment, but we’ll need to do it all over again in our new nest and hope that it all fits. Our first pre-organization tip is to sort your gear into two piles:
- what you use
- what you don’t use
Take the pile of what you don’t use and divide it into three more piles:
- things to sell
- items to donate
- broken and unusable items to recycle or trash
List items to sell on Kijiji (or Craigslist or whatever your local outdoor gear swap page might be). Donate items to your local thrift store. And don’t even hesitate – bag up those broken pieces of gear that can’t be salvaged and take them to the recycle container or trash!
Now comes the hard work – organizing your remaining gear so that it is accessible but doesn’t rule the roost. In a normal year, we are constantly heading out on trips – whether it’s paddling the Milk River in spring or flying off to the American SW with our biking gear or planning an active hiking, biking and camping trip locally in PLPP.
Staying organized is the only way it we can make it work.
Tip #1: Add Shelving
You can build your own or buy ready-made shelves. The benefit of building your own is that you can customize shelf heights for your particular needs. Buying ready-made is easier, but make sure it works for what you need and doesn’t waste precious space. Our gear room has shelves built from 2x4s and OSB board – but you can use anything that you have on hand.
The shelves were designed to fit our large YETI cooler and camp boxes. We have boxes dedicated for particular uses. One is strictly for car camping adventures and extended canoe trips. It holds our stove, cooking pots and pans, dishes and utensils, wash pan, scrubbie and dish towel, biodegradable soap, etc. and has a laminated plywood lid that acts as a cutting board and food prep counter. The area below the bottom shelf is perfect for storing bulky ski boots.
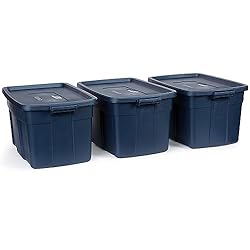
Tip #2: Use Plastic Bins
We like storing similar items in plastic tote bins. Each bin can be labelled so that you know exactly what’s inside. These bins are light and easy to move around. They also help protect what’s inside the bin from dust – not that you should have anything in your gear room that you don’t actually use, but some gear is strictly seasonal!
Tip #3: Create a Pegboard Wall
Our packs are stored hanging on a pegboard wall for ease of access.
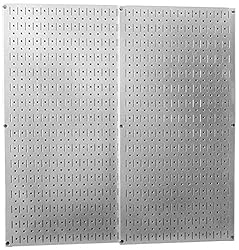
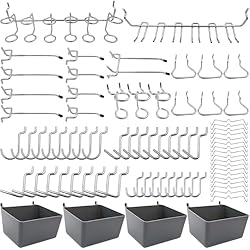
The pegboards hooks (click on image below for an assortment of hooks and bins) are easily moved to make room for large backcountry packs, smaller daypacks, Camelbaks and tiny hot weather hiking fanny packs. We also hang our sleeping bags on pegboard to avoid compression with longer-term storage. Storing on the wall also allows wet packs and gear to dry properly after those unpredictable wet weather adventure days.
Tip #4: Add a Drying Rack
Speaking of drying, we like to have a drying rack that also works for storing coats and ski pants and lifejackets and other paddling gear. Options are to have a dedicated rack or have room for a portable drying rack that you can set up in the center space to dry toques and mitts and such before storing away in bins.

Tip #5: Leave Space for Packing
Center space? Yup, leave space in the center not just for a potential drying rack set up place, but more importantly for packing gear. You can pull bins down off shelf, packs and sleeping bags from the pegboard and get everything packed together in one place. Due to more time at home base due to the pandemic this past year, our center space served double purpose as a workout room. It still works, though!
Tip #6: Put up a Ski Rack
Skis are notoriously awkward to store. Stand them in a corner and you are constantly fighting to pick out the pair you need for the next outdoor adventure. Ski poles always seem to get wrapped around nearby bindings and everything usually comes crashing down in one loud mess. Ours is a simple wooden rack but you can buy ski storage solutions, too (click on image below). If you have more than one pair of skis, put up a rack.

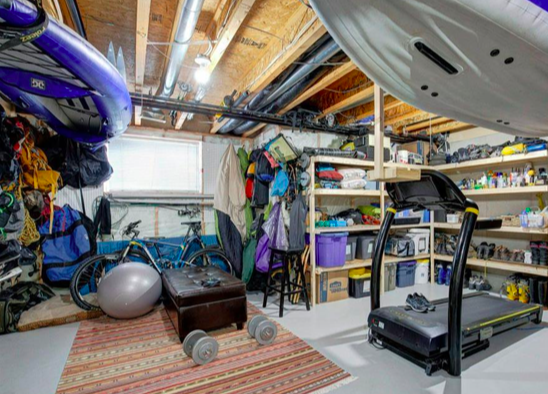
Tip #7: Storing Outdoor Gear in the Rafters
Inflatable kayaks can be stored deflated in their carrying bags but over time creases form. These creases can eventually become weak spots where the material is more fragile and prone to wear and tear. We store our kayaks inflated and hang them from the exposed joists. See – there is an upside to having an unfinished basement (or garage)! Paddles also store nicely in open ceilings.
Bonus Ideas
- Add a workbench for gear maintenance if you’ve got the room. We had one in our previous place that was perfect for hot waxing and tuning up skis, repairing gummed up stoves, waterproofing hiking boots and on and on.
- Our bikes normally live in the garage when not in use – hung up on the wall so they’re out of the way. If you’ve room in your outdoor gear space, you might consider hanging bikes vertically (click on the image below for a wall mount storage option) to limit the space they take up!
What would you add to our tips for storing outdoor gear? Feel free to drop a note in the comment box below.
And send pics of your gear room – we’d love to see them!
I am definitely ordering that peg board assembly, I Have been looking for peg board bins for some time! Now some motivation to clear out our storage room for more gear storage!
Yahoo – be sure to send us a before and after pic or two!